Track Mixer plays your choir's separate voice parts together. Bring your own part forward while learning it, listen to one part alone, or mute it and sing with the other voices.
Who can set up Track Mixer?
You need Manage repertoire permission to see the Regular and Track Mixer management tabs. Your choir decides which roles have this permission.
Uploading and managing mixer files also requires Premium access through your choir's subscription, an eligible Premium trial, or your individual Premium subscription. You can read this guide and see the setup controls before upgrading. If you need Premium, ChoirMate explains this when you choose to upload a file.
Members with Premium access can listen to the mix without repertoire-management permission.
Prepare the files
Use one MP3, M4A, or WAV file for each voice part, instrument, or backing track. Export the files from the same arrangement with the same duration and starting point. Keep any opening silence in every file so the parts line up when played together.
Tip
Upload the voice parts
- 1
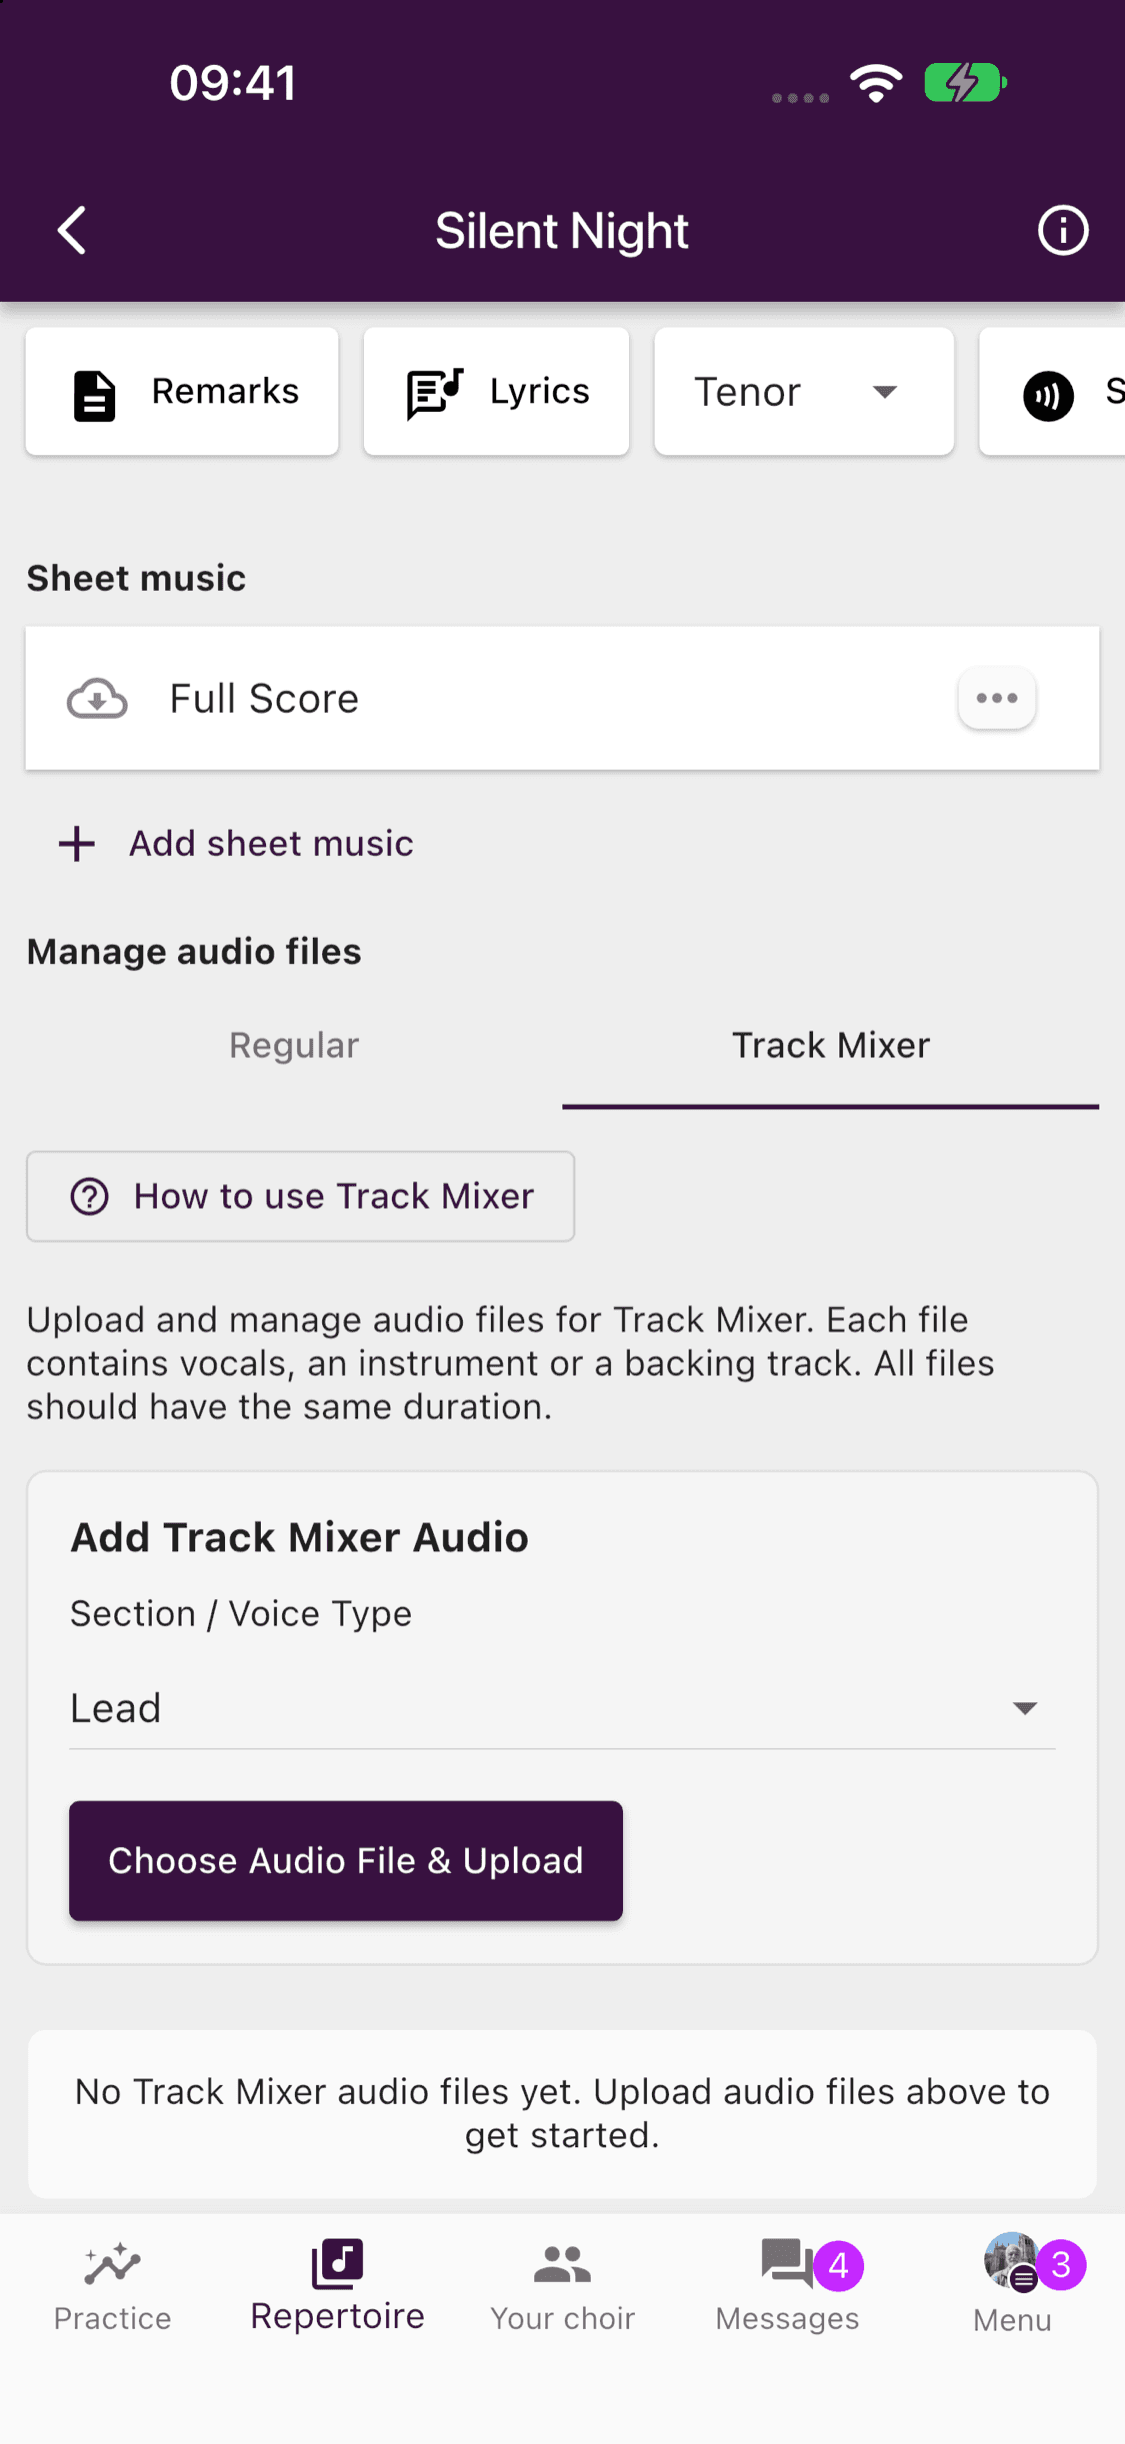
Open Track Mixer
Open Repertoire, choose the set list and song, then select Track Mixer in the audio screen. You do not need to enable it separately for each song.
- 2
Choose the voice type
Under Add Track Mixer Audio, select Section / Voice Type. Choose the relevant voice part, lead vocal, or instrument. For a custom type, enter a display name such as “Piano” or “Click”.
- 3
Choose and upload the file
Tap Choose Audio File & Upload, select your file, and keep ChoirMate open until the upload finishes. Repeat for the other voice parts.
- 4
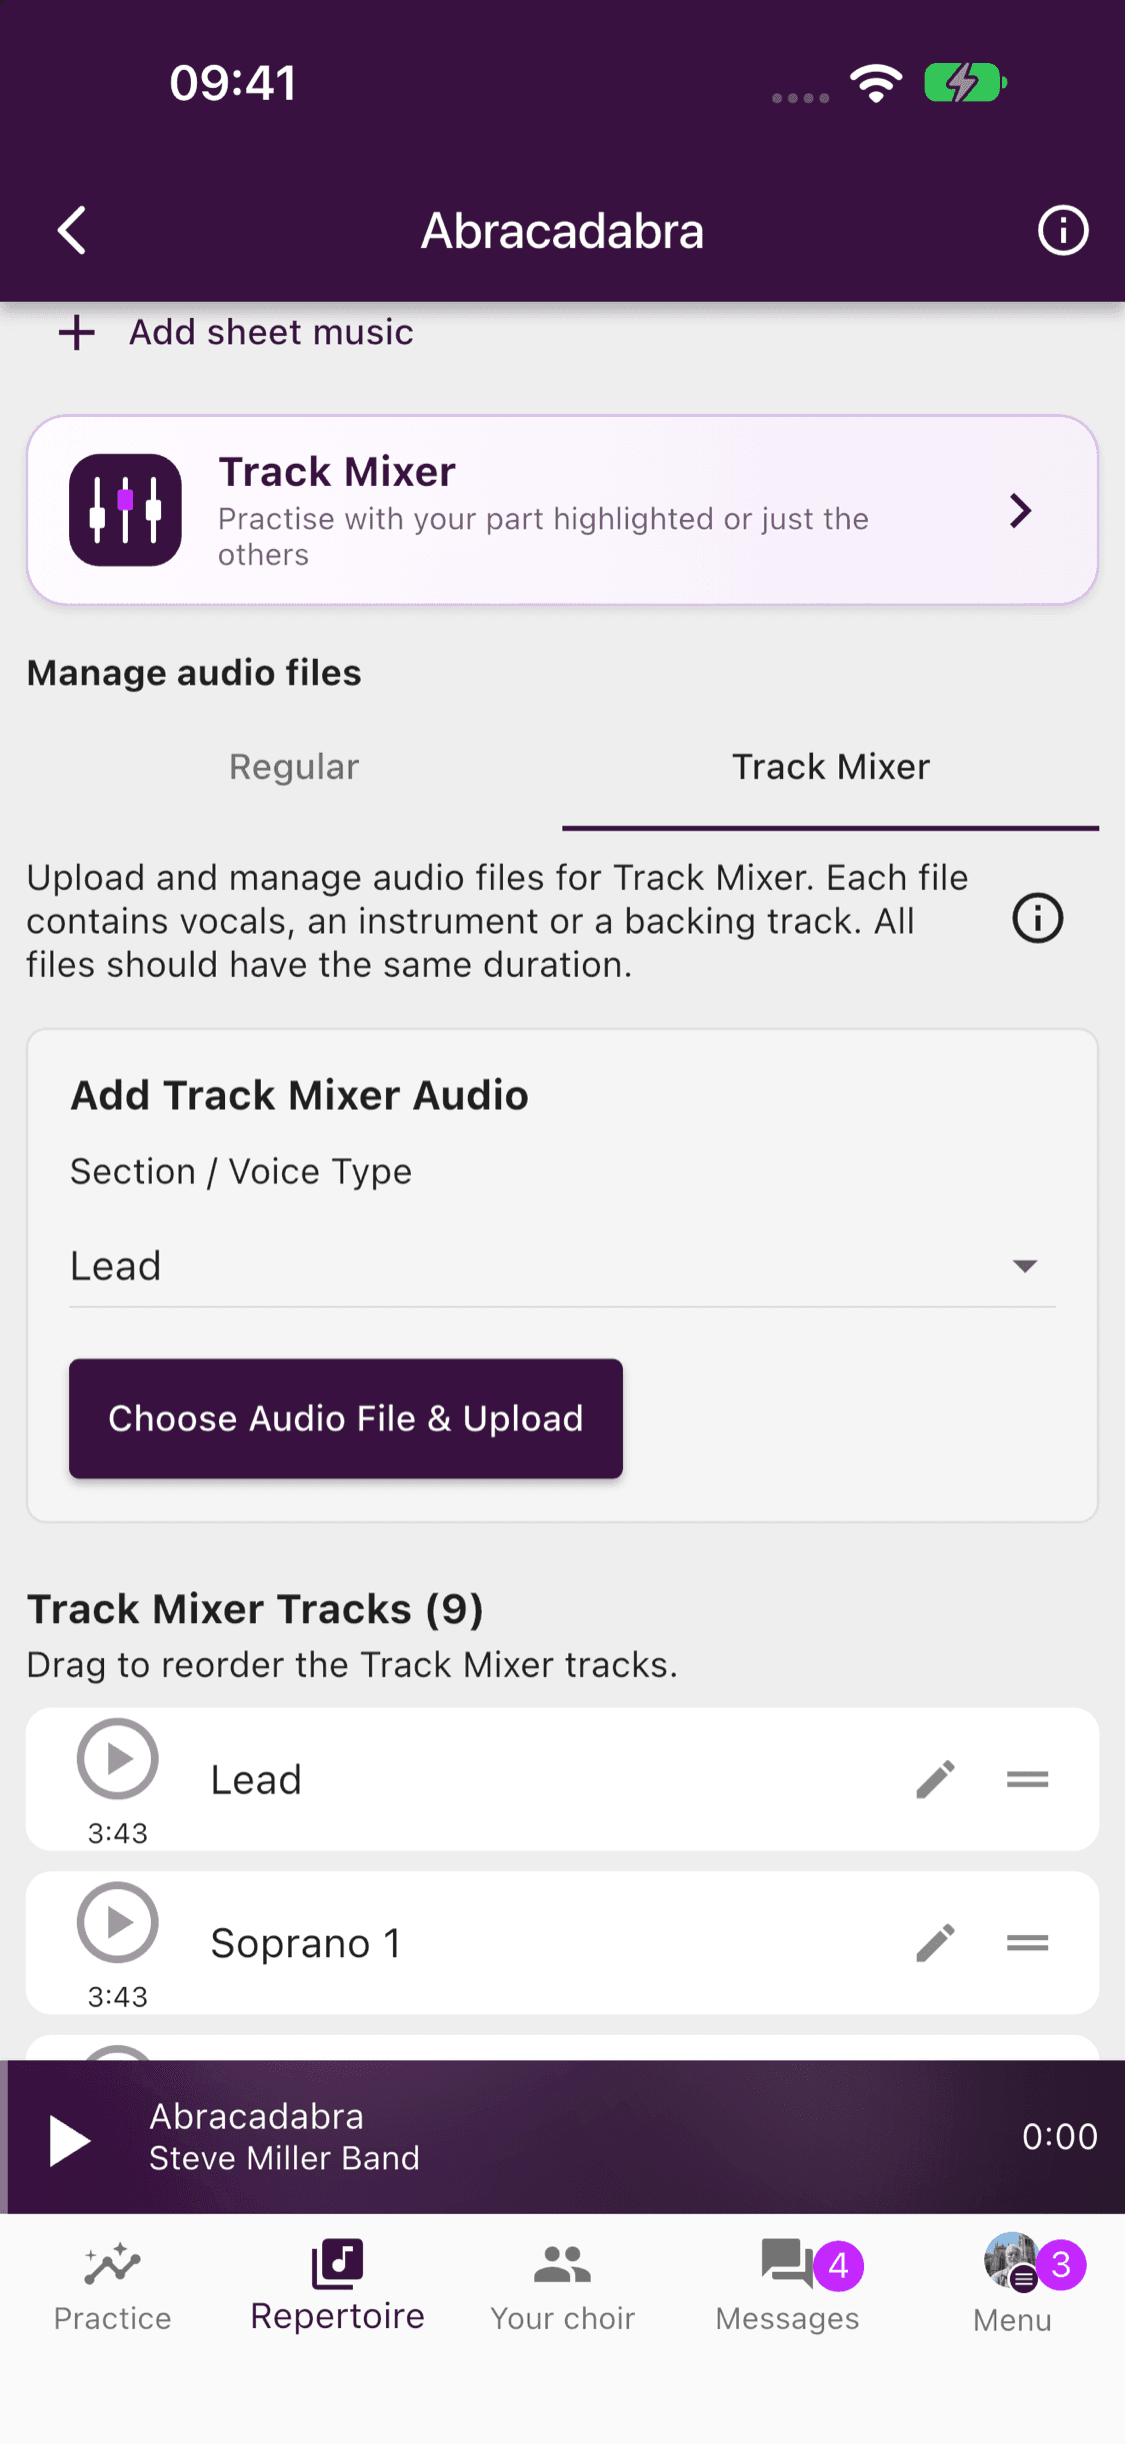
Check the uploaded files
Your files appear in the mixer list. Check their names and durations. Once a file exists, the getting-started help button becomes a small info icon beside the introduction. Tap it whenever you need this guide again.
Practise with the mix
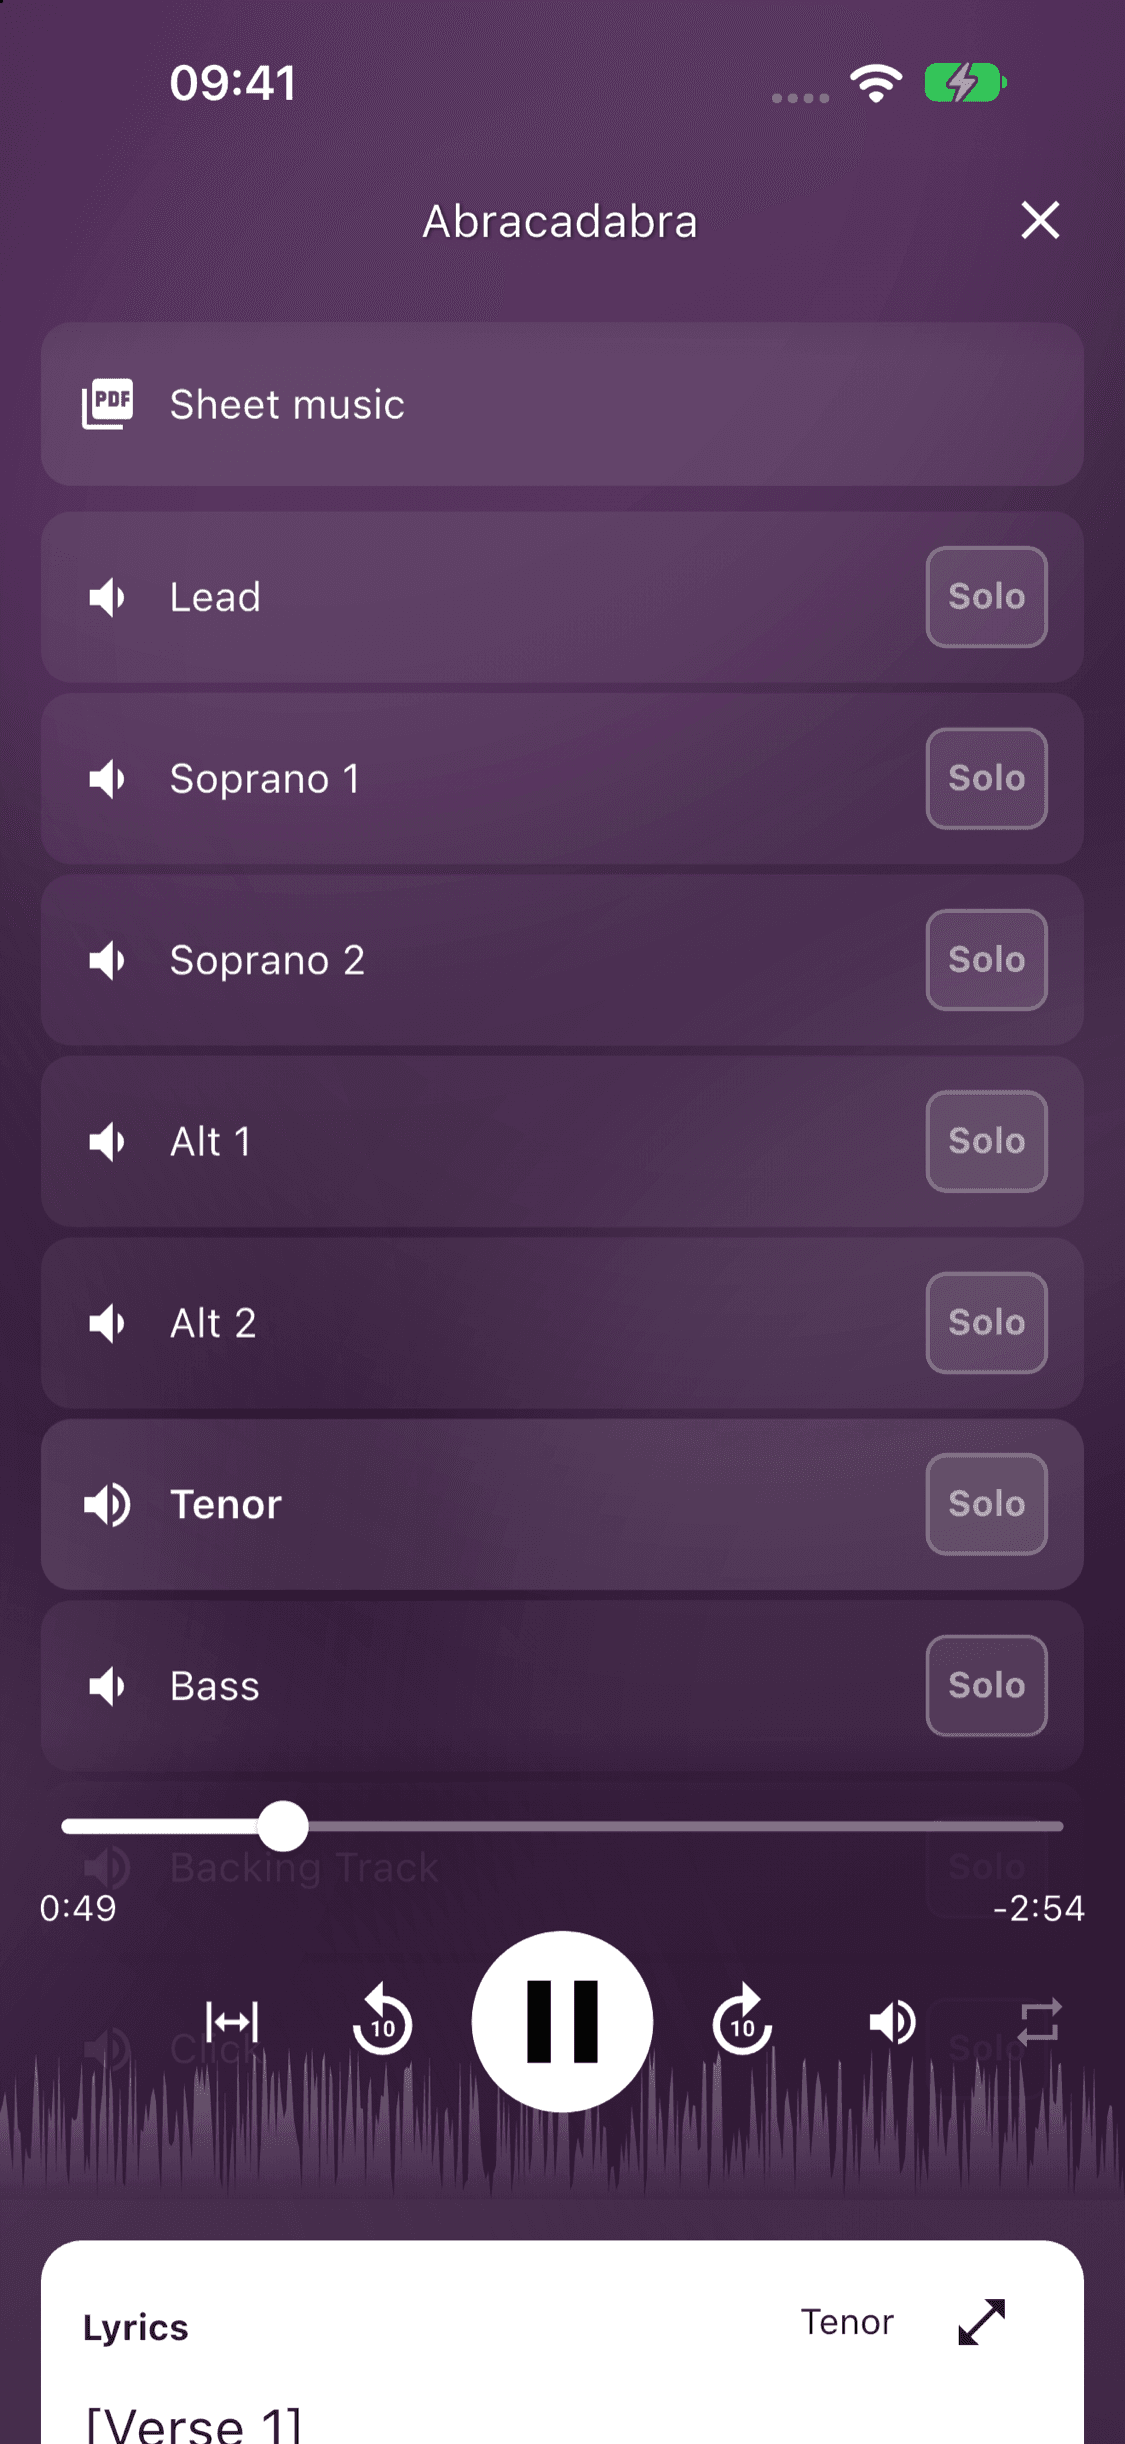
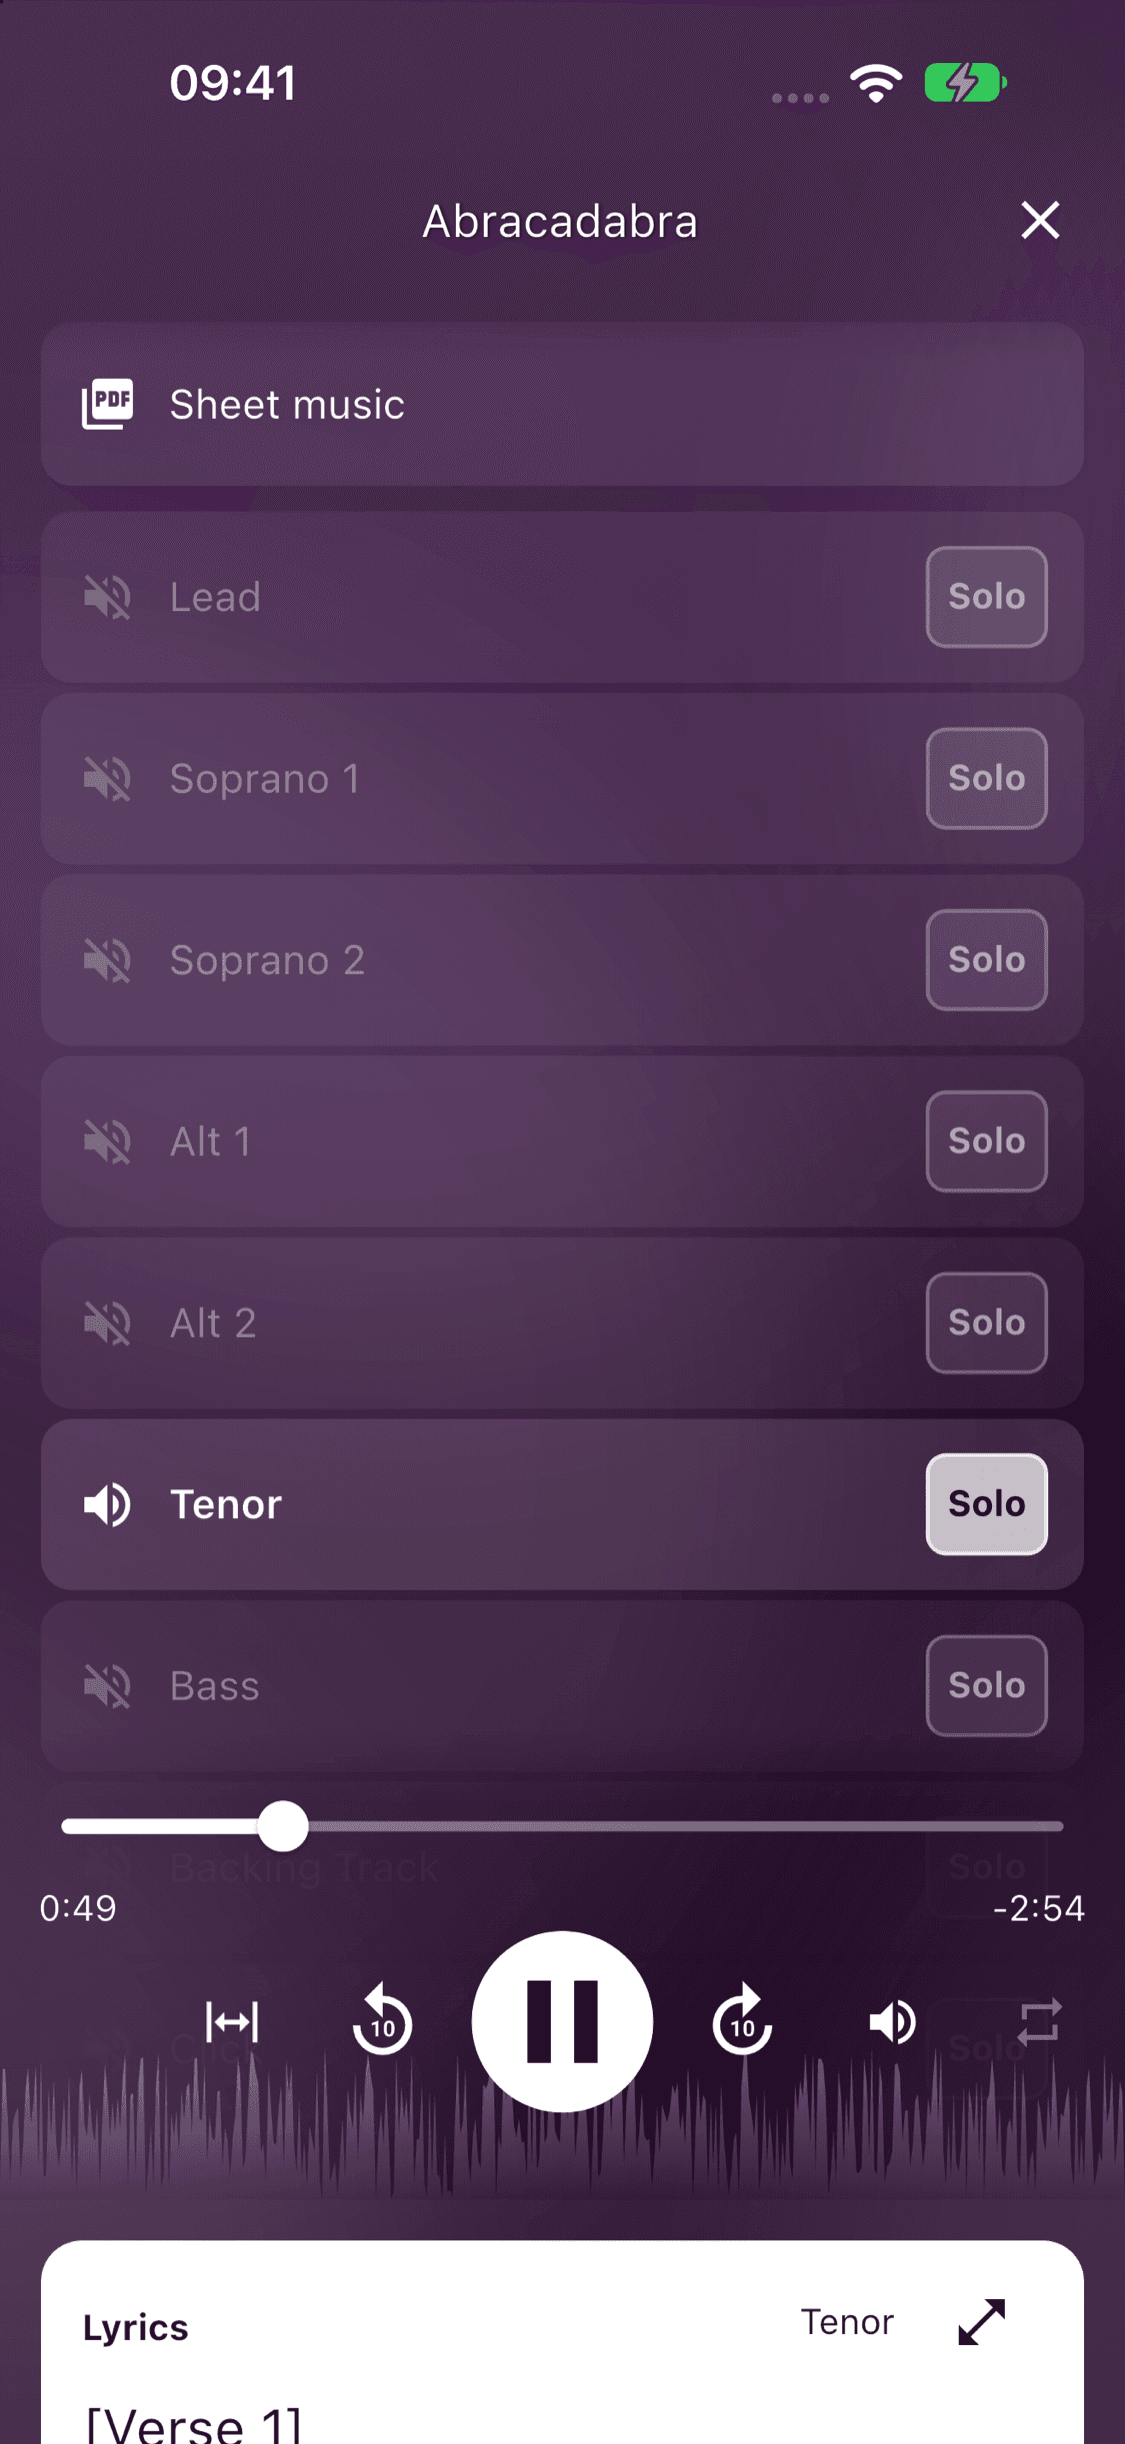
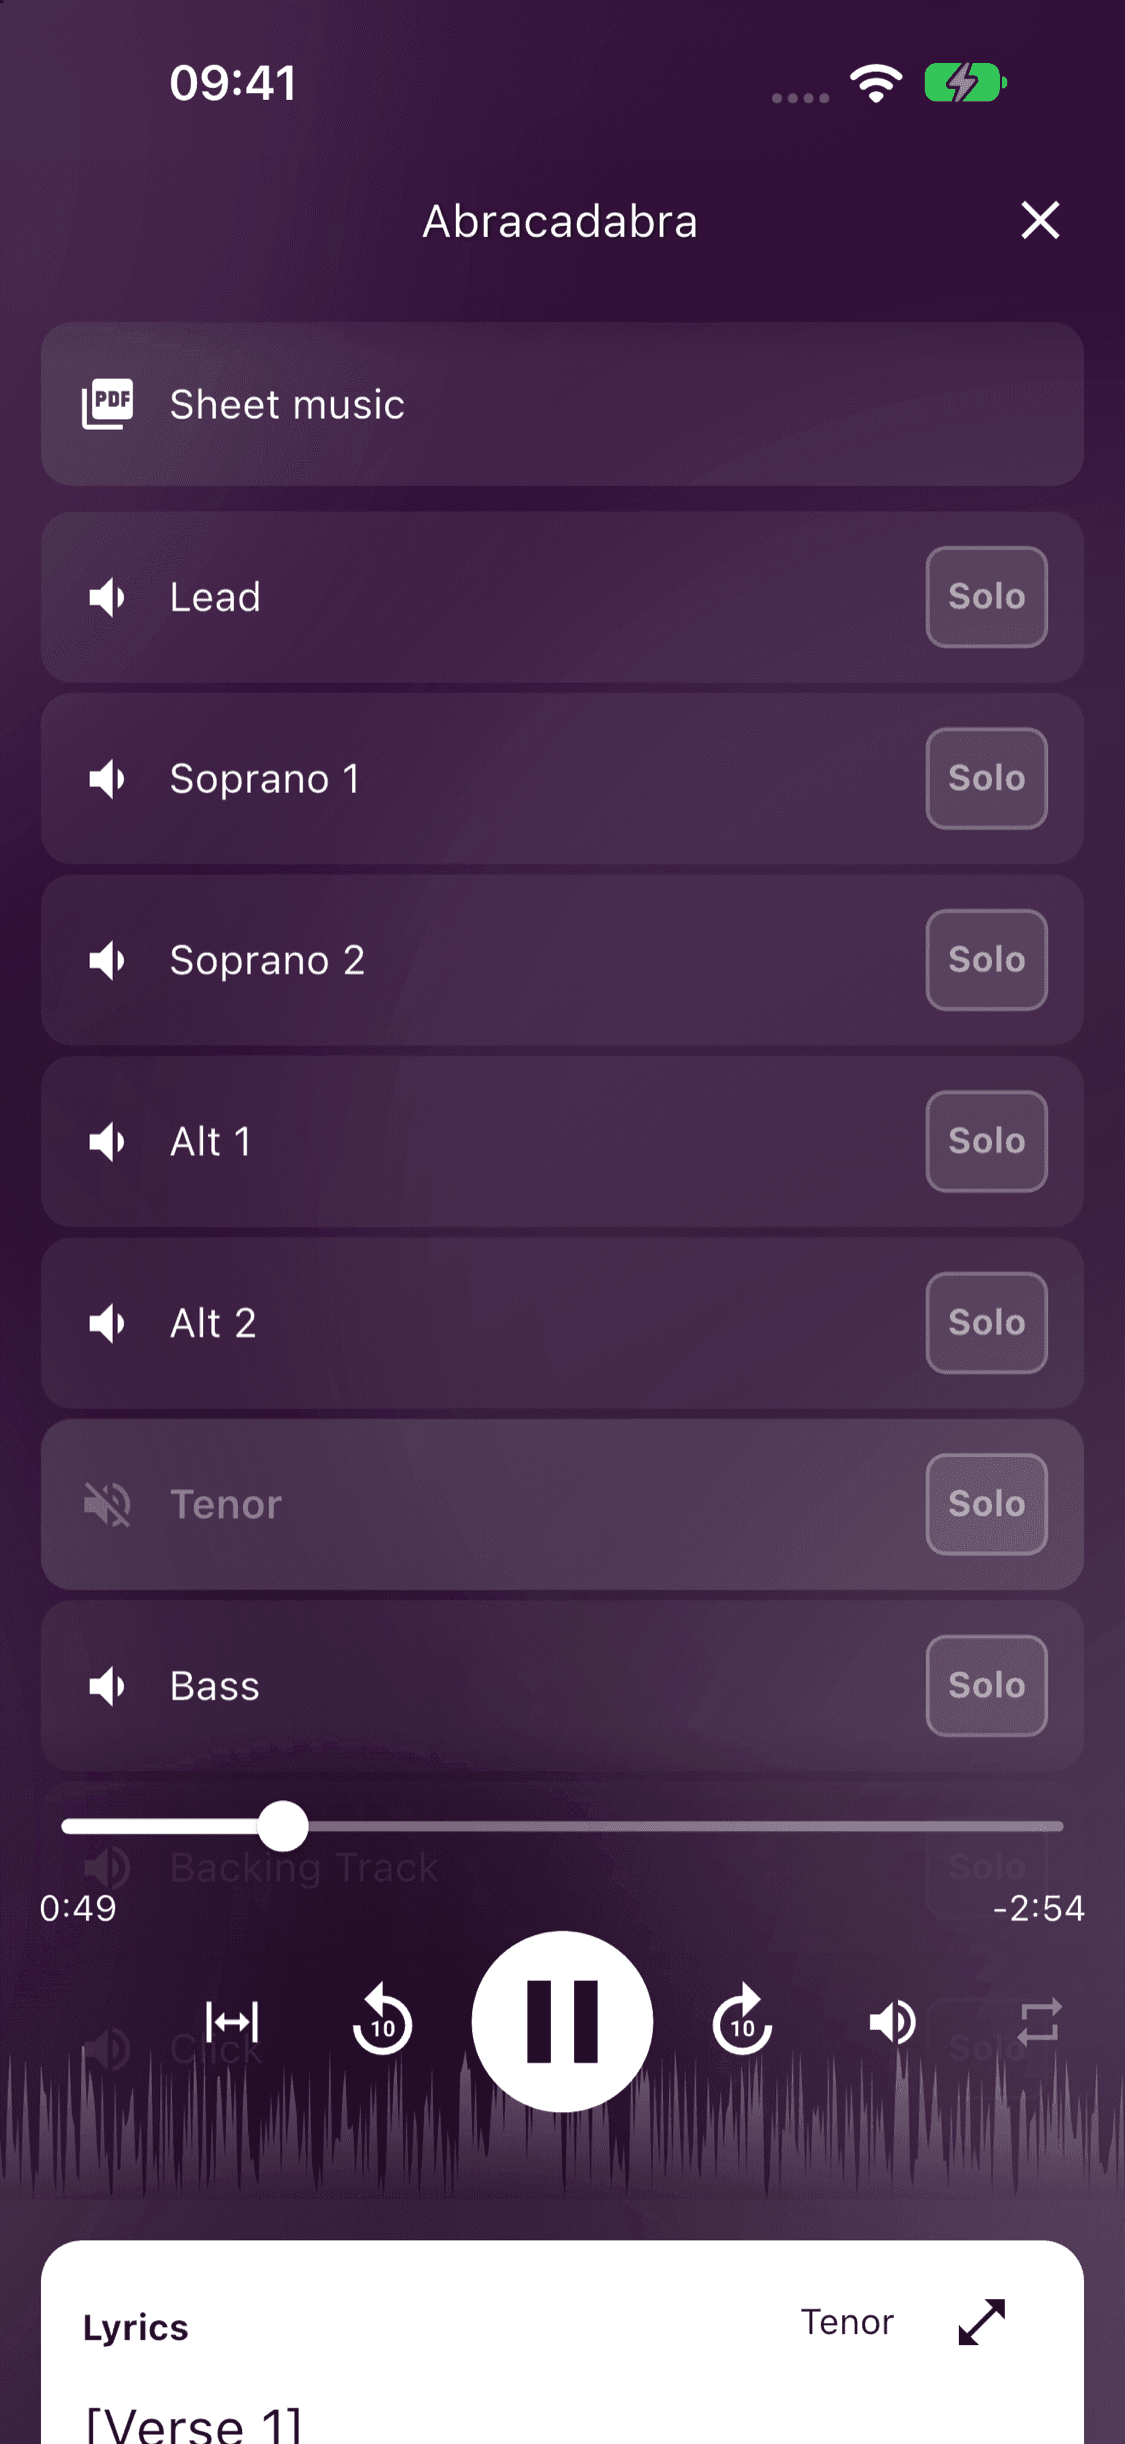
Open the song's Track Mixer player and press play. The parts share the same playback position.
- Tap a part's speaker control to cycle its volume. Make your own part louder and the others quieter while learning.
- Tap Solo to solo a part. Tap it again to return to the mix.
- Use the speaker control to mute a part, then sing it yourself with the others.
Keep the files organized
In the management tab, use the edit control beside a file to change its display name. Drag the files to change their order. Swipe a file to reveal deletion and confirm only when you want to remove it. These actions require both repertoire permission and Premium access.
If you remove the last mixer file, the prominent getting-started button returns. Ordinary audio files stay separate in Regular and do not count as mixer parts.