Add a practice track to the voice part that needs it, or make one recording available to several sections. Audio stays with the song, so members can find it from the repertoire and their practice lists.
Tip
The web version is best when you have several files. You can drop files into a voice-part area or upload one file to every available section at once.
Supported files
- The app accepts MP3 and M4A files.
- The web version accepts MP3, M4A, and WAV files.
The app checks the recording length before uploading. Both versions also check the file type and your account's upload-size limit. If a file is stored in iCloud Drive, Google Drive, Dropbox, or another cloud service, download it to the device before selecting it.
Who can upload audio?
Choir settings decide the minimum role allowed to import audio and the minimum role allowed to share it. New choirs allow members to import and share audio by default, but a choir owner can restrict either action.
Your subscription and storage allowance can also affect whether another file may be added. ChoirMate explains the relevant limit when an upload cannot start.
How voice parts and practice lists work
Each audio file has two separate assignments:
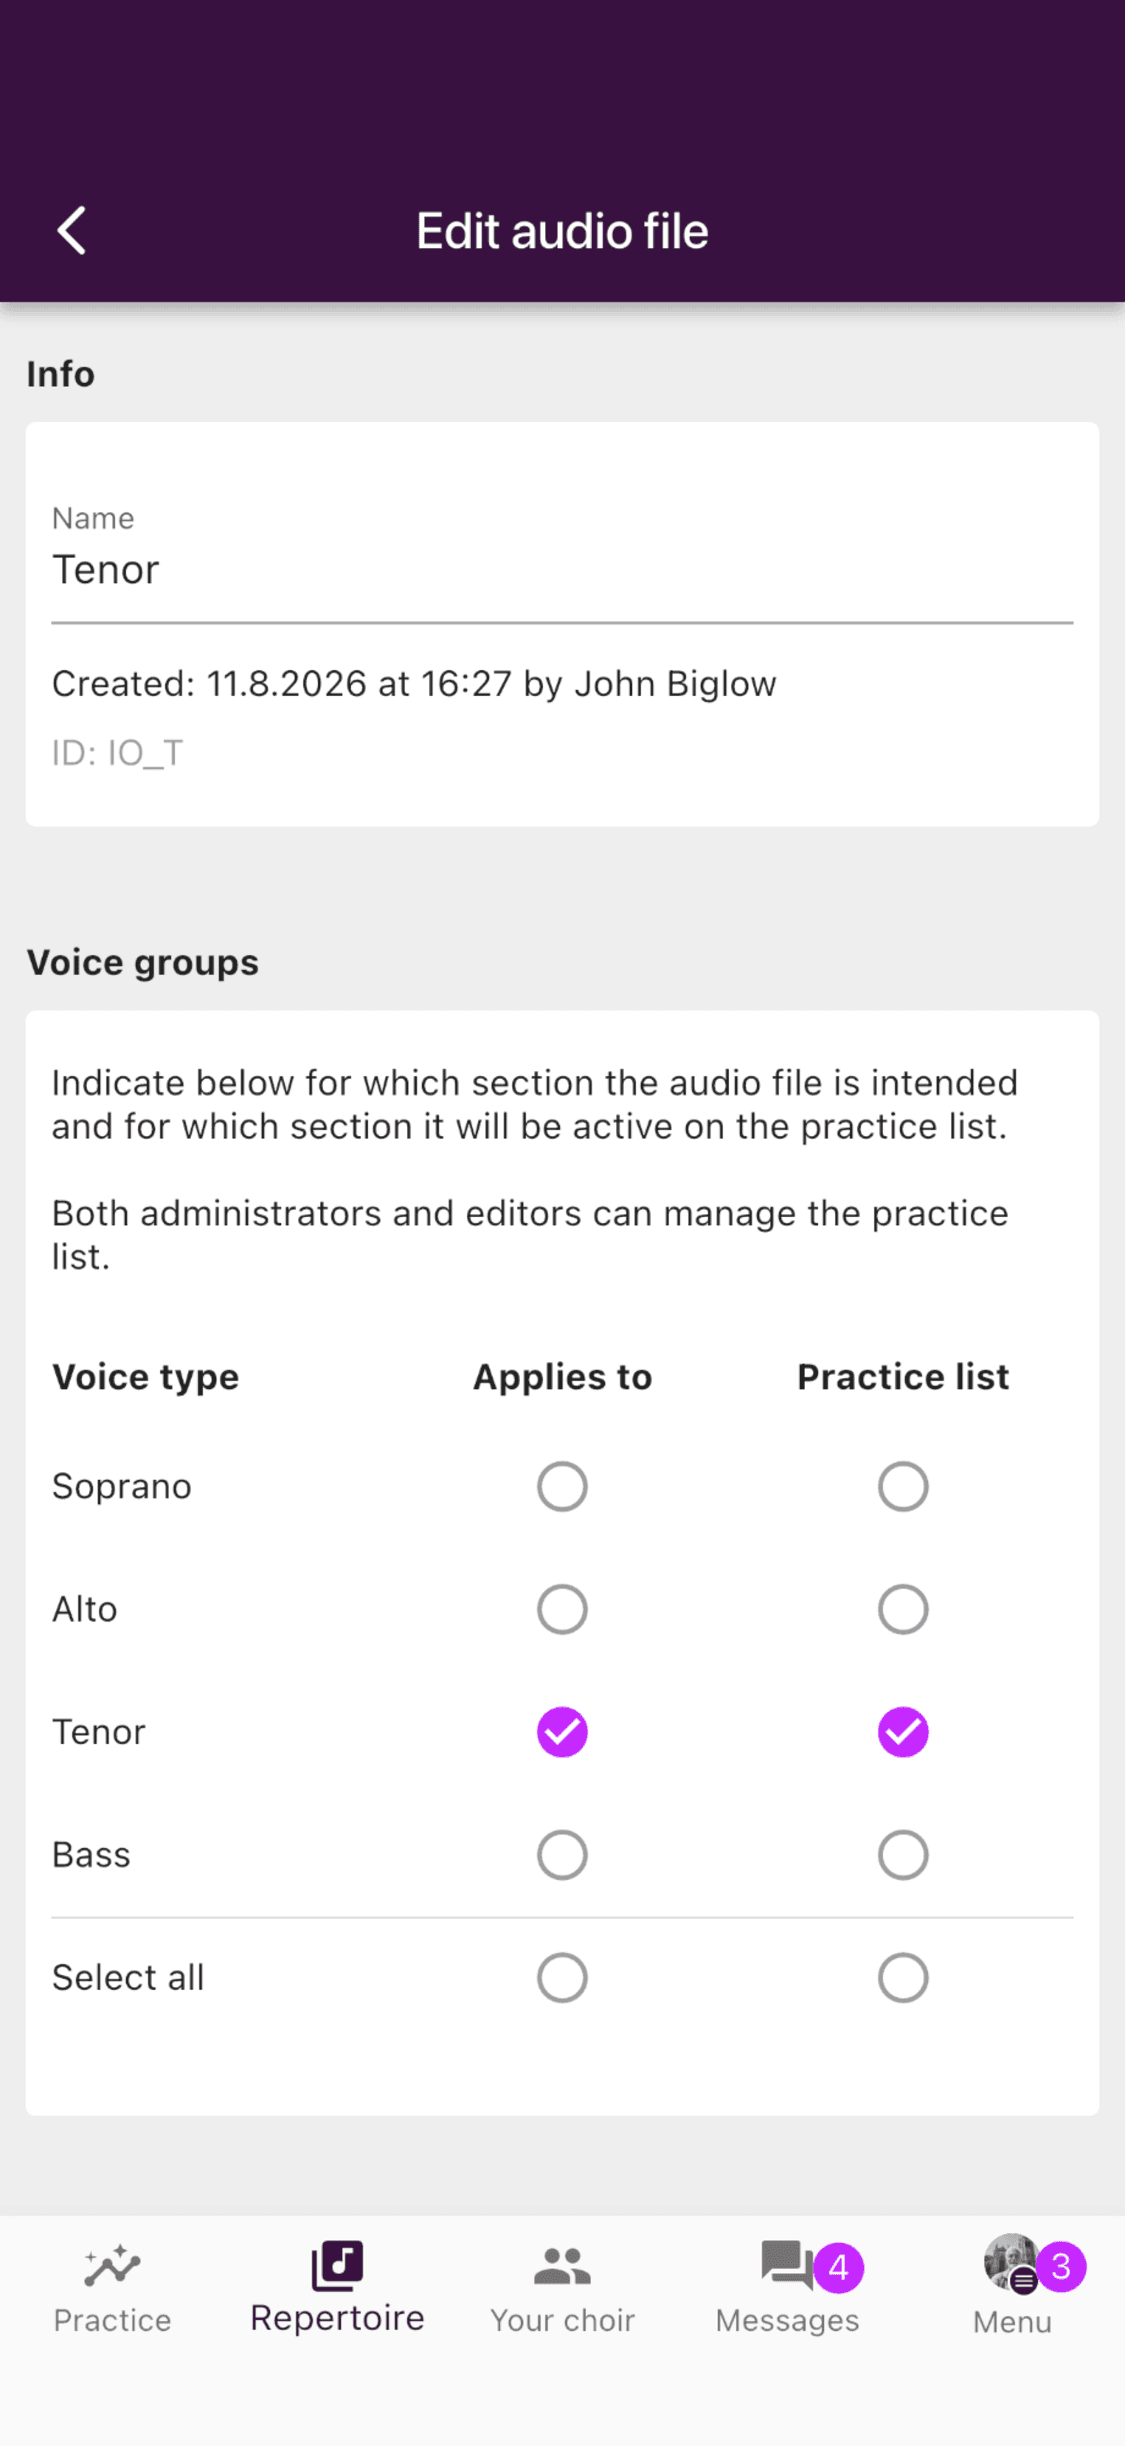
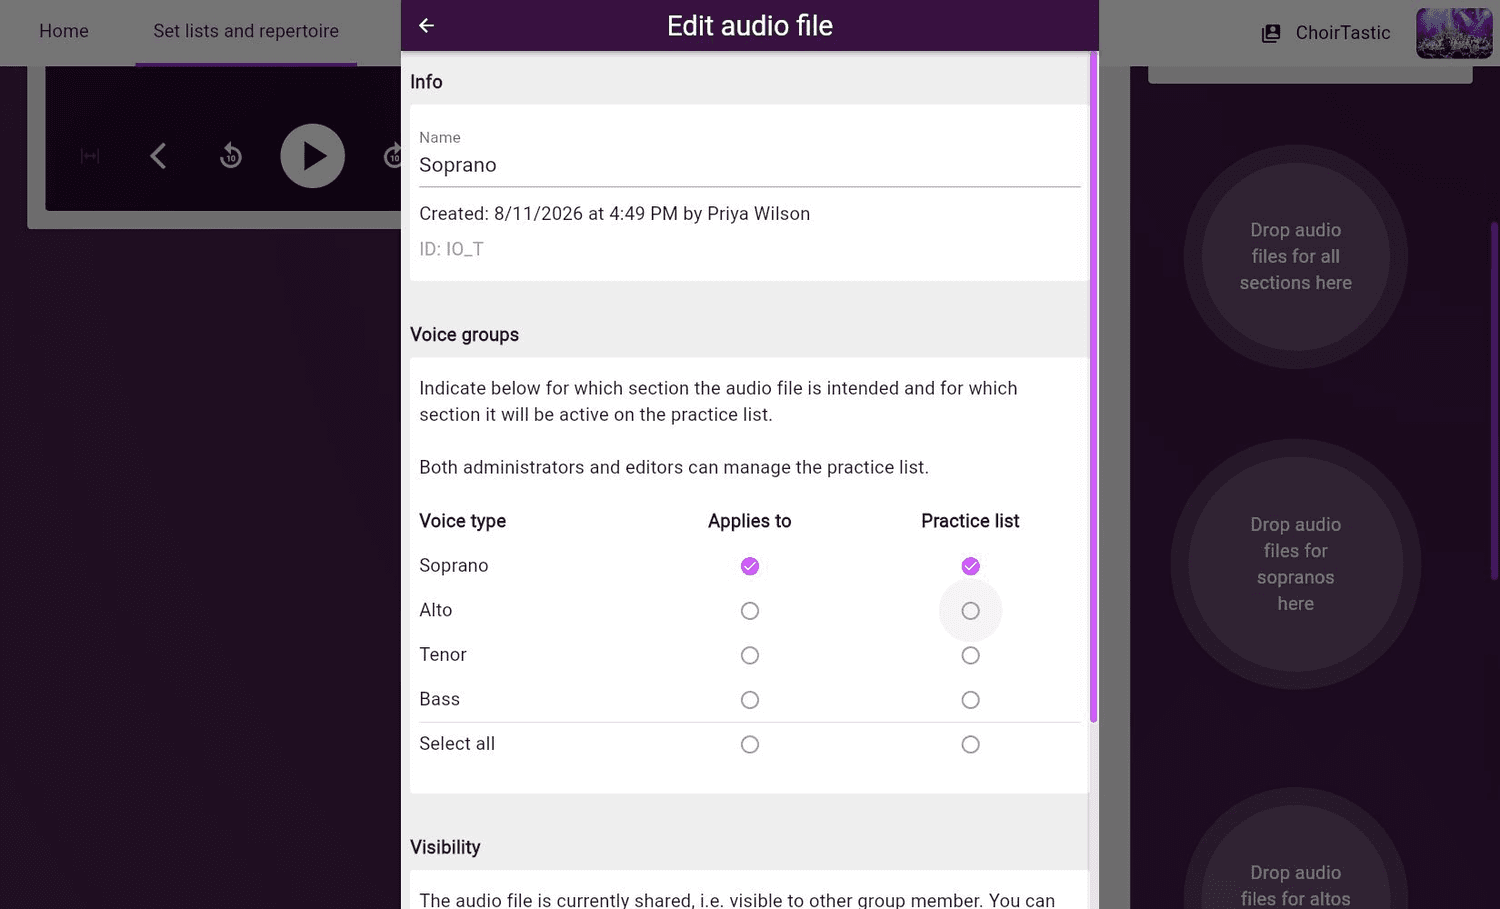
- Applies to controls which voice parts can find and play the file.
- Practice list controls which voice parts see it in the choir's group practice list.
A file can apply to several sections without being in every section's practice list. Use Select all for a full mix or accompaniment that everyone needs.
For a piano-only track, balanced mix, or another recording that several sections need, select every relevant voice part under Applies to. Do this for each audio file. Assigning a file only to Musician does not make it visible to singers. If the file should also appear in the Soprano 1 group practice list, for example, select Soprano 1 under both Applies to and Practice list.
Upload in the app
- 1
Open the song
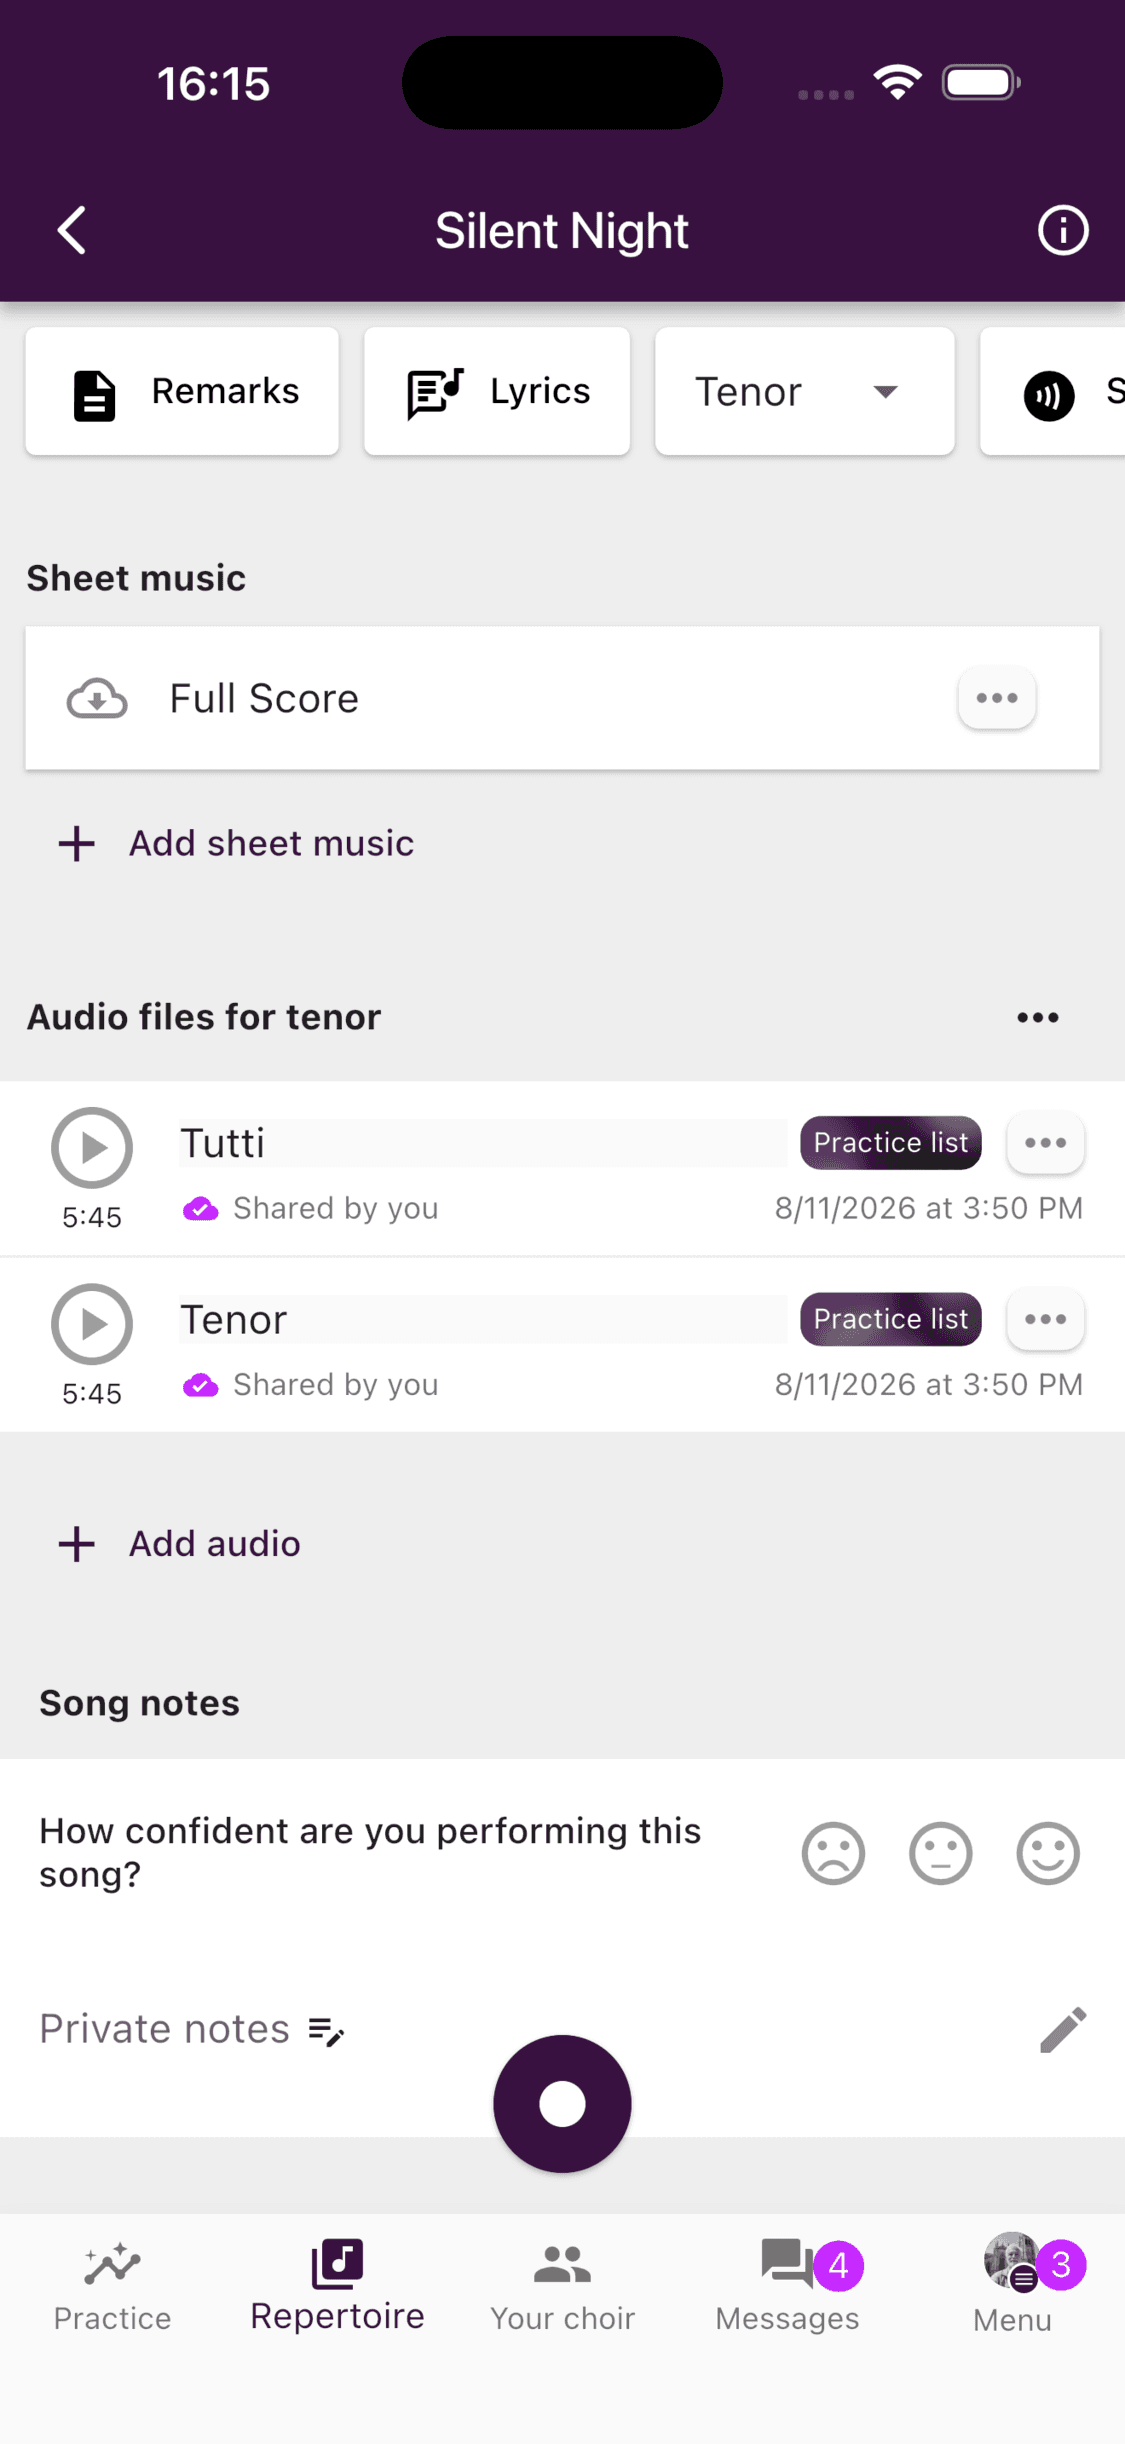
Open Repertoire, choose the set list, and open the song. Select the voice part at the top of the song if you need a different section.
- 2
Select Add audio
Scroll to Audio files for [voice part] and tap Add audio. ChoirMate opens the device's file picker.
- 3
Choose an audio file
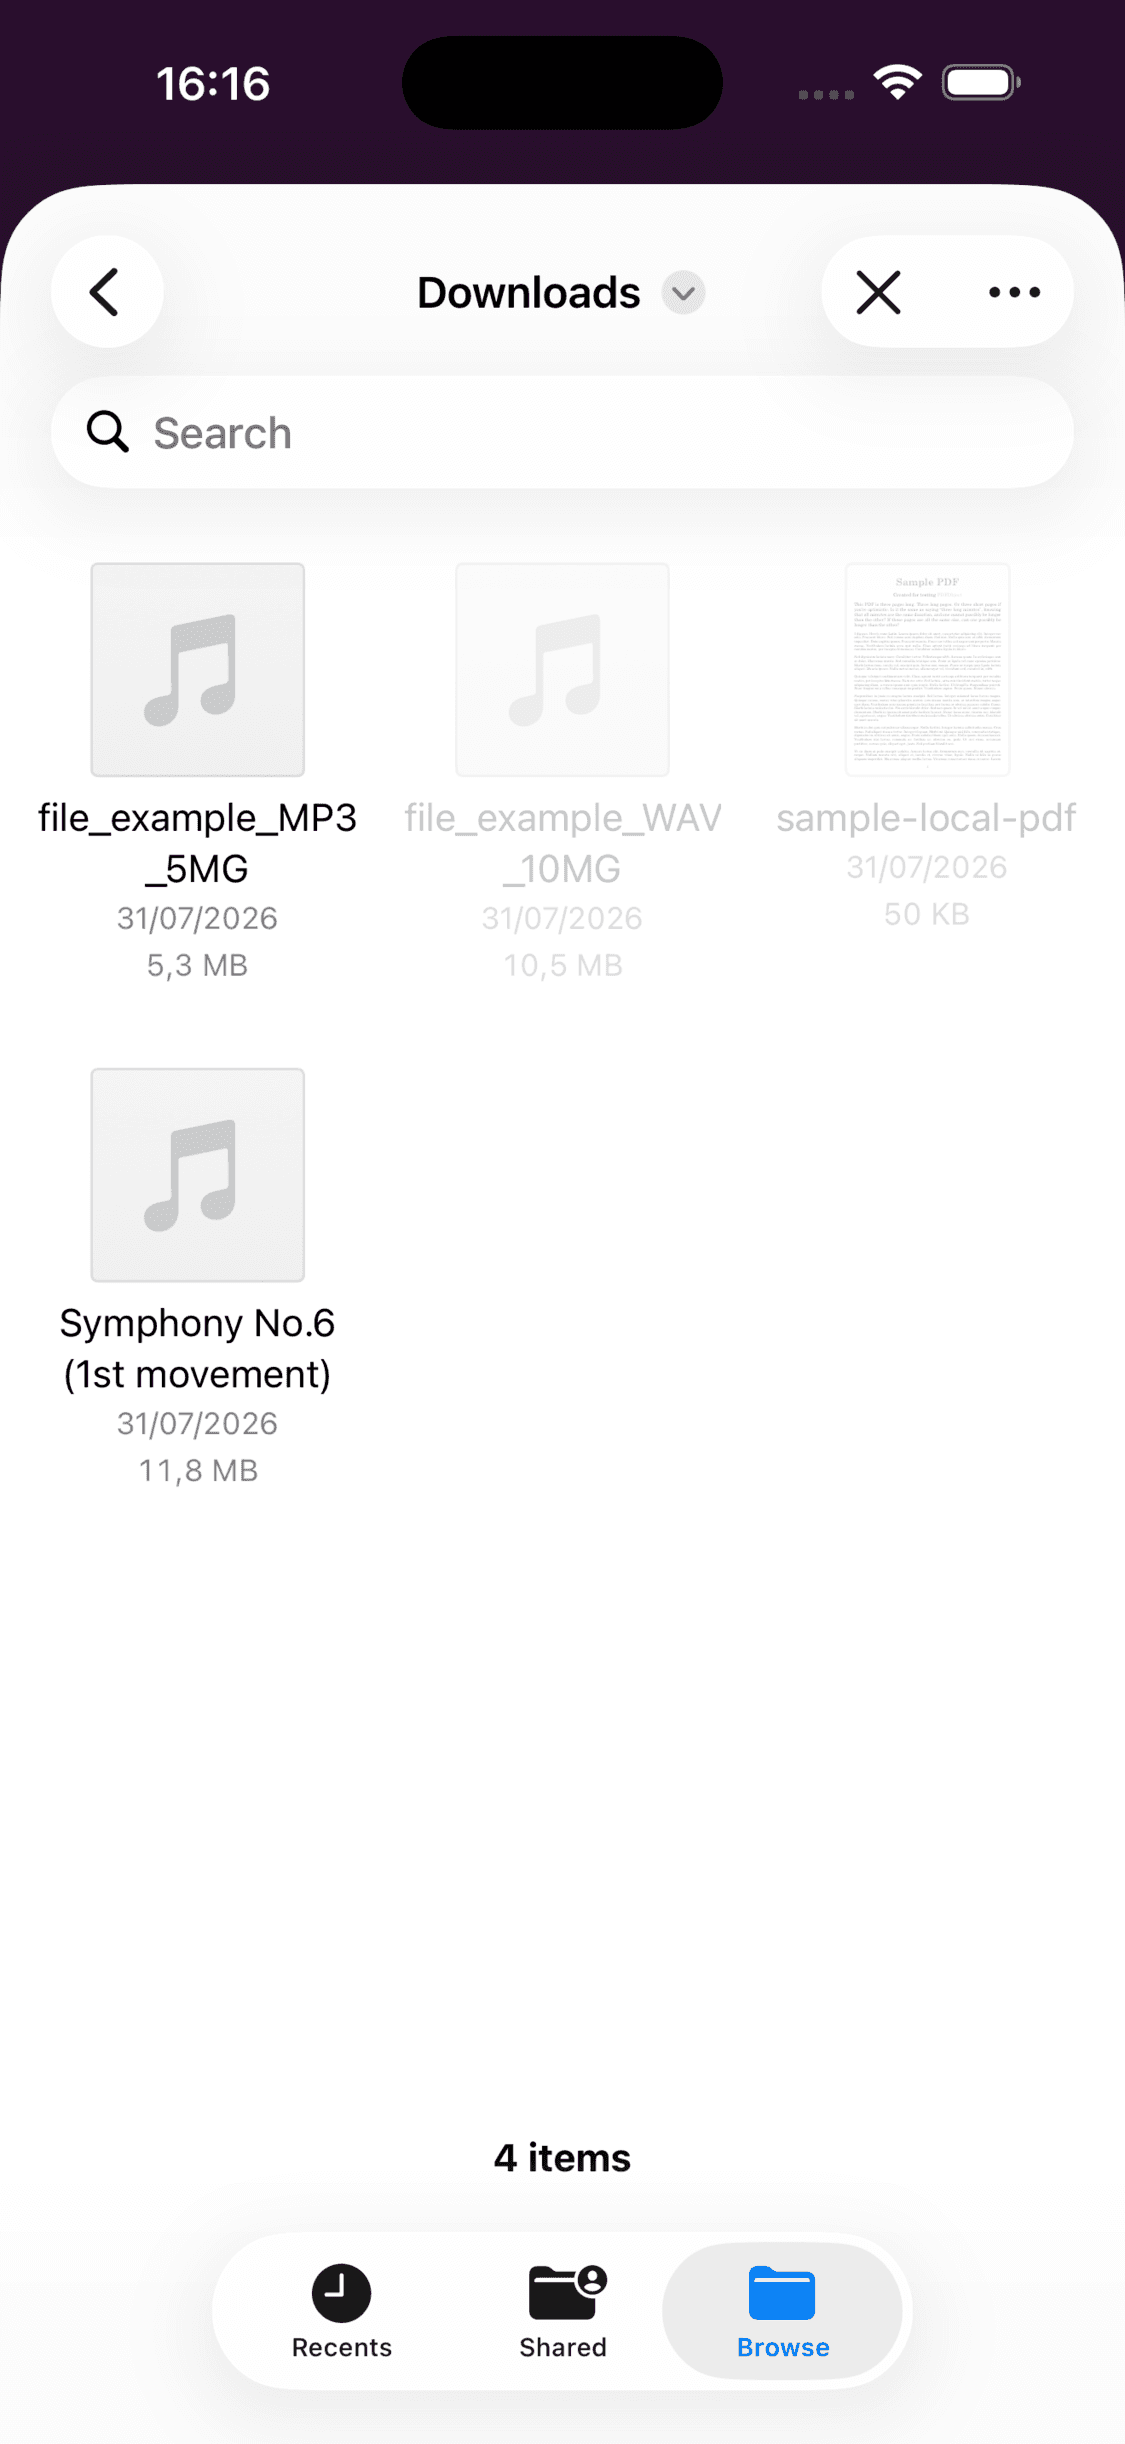
Select an MP3 or M4A file. Files that the app cannot import are disabled in the picker.
- 4
Wait for the upload
Keep ChoirMate open while the progress indicator is visible. The track appears under the selected voice part when the upload is ready.
- 1
Open the song in edit mode
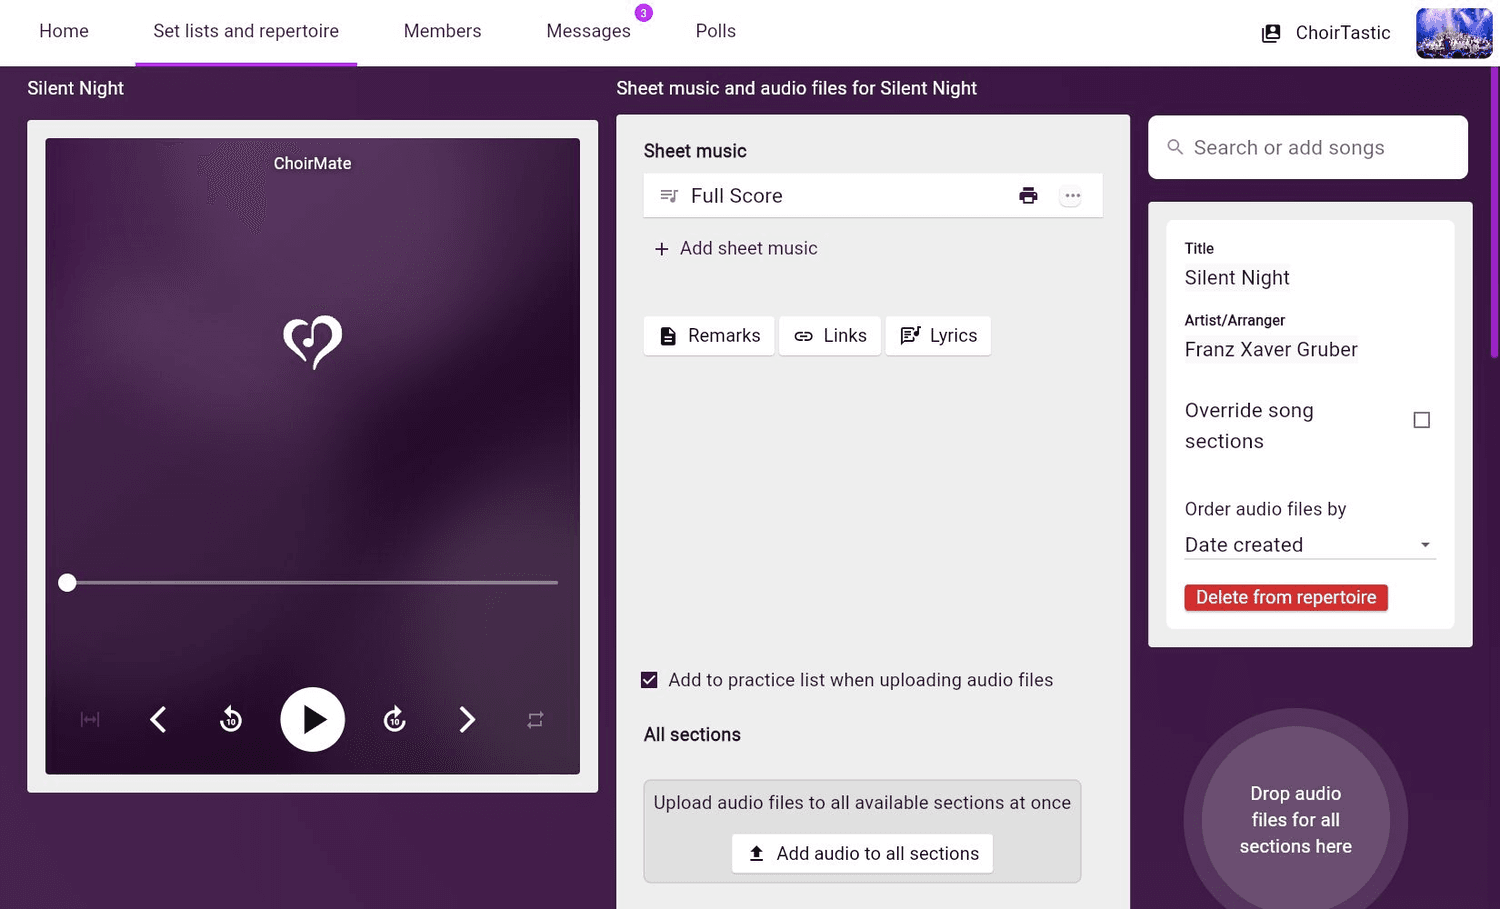
Sign in at web.choirmate.com, open Set lists and repertoire, choose the set list, and select the song. Switch to edit mode if the page offers Switch to edit mode.
- 2
Choose the practice-list setting
Use Add to practice list when uploading audio files if new uploads should also appear in the group practice list. This option is available to people who can manage the repertoire.
- 3
Choose an upload target
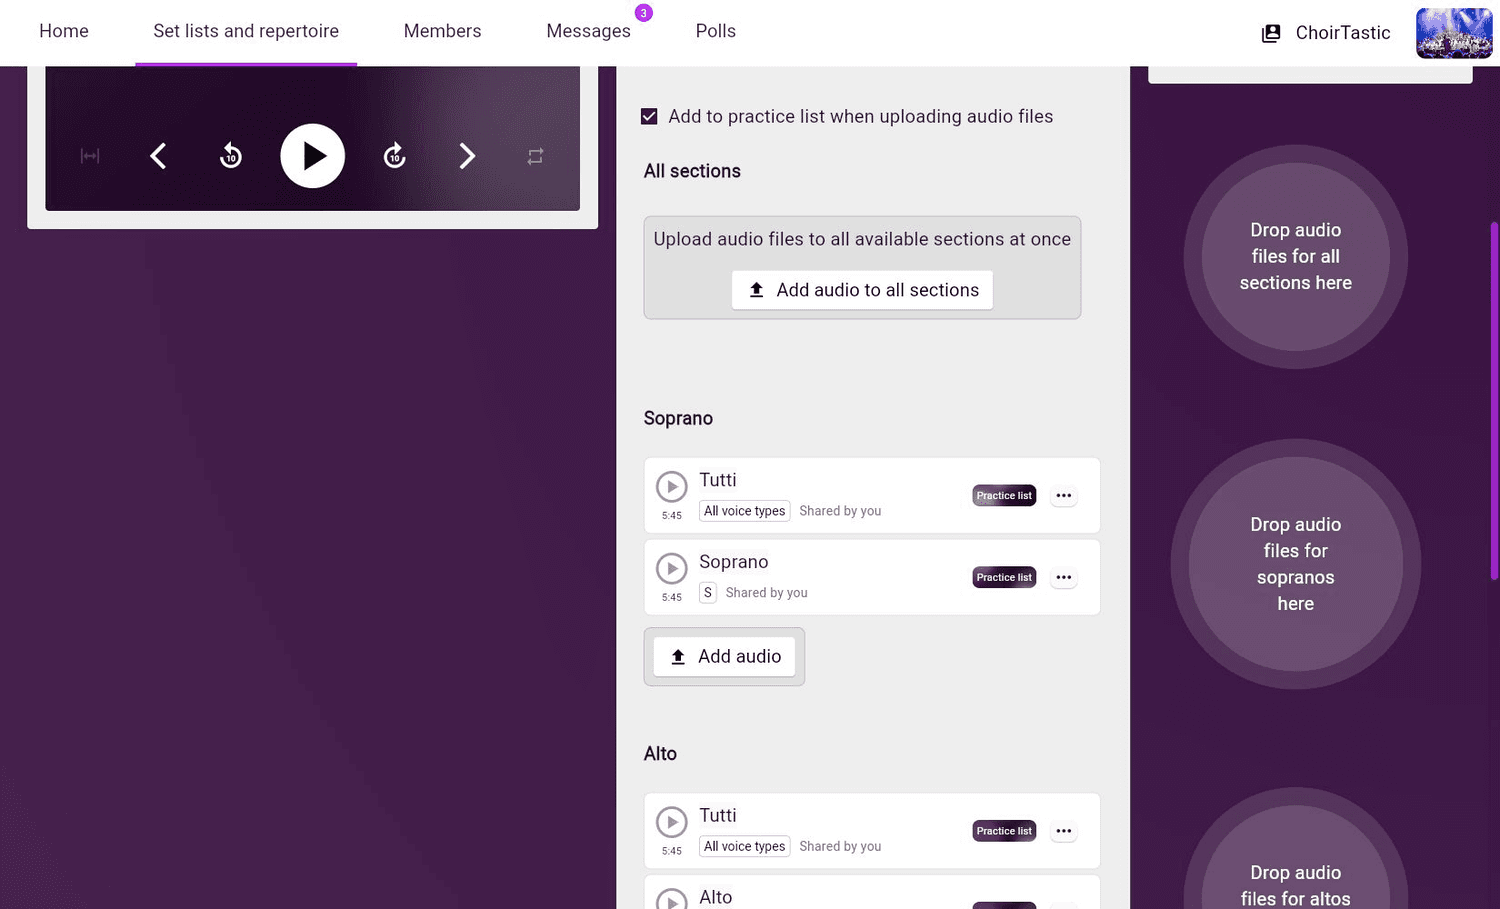
Select Add audio in one voice-part section, or drop files into that section's target. For a full mix, use Add audio to all sections or the all-sections drop target. A drop may contain up to five files; the Add audio button selects one file at a time.
- 4
Let the upload finish
Uploaded files appear in the selected section. You can continue working on the song while other uploads finish.
Change a file after uploading
Open the three-dot menu beside the audio file and select Edit. The same editor is available in the app and on the web.
From here you can:
- change the file's display name
- add or remove voice parts under Applies to
- add or remove the file from the group practice list for each voice part
- change Visibility between Private and Shared
Info
A private file is visible only to you. A shared file is visible to members in its assigned voice parts. Making a practice-list file private also removes it from the group practice list.
Put audio files in a custom order
Audio files normally follow their upload date. Choir Admins can instead choose a custom order for each voice part:
- Open the song for editing. In the app, open the song's menu and select Edit song. On the web, switch the song to edit mode.
- Under Order audio files by, select Custom, then save the song.
- Return to the song and open the three-dot menu for the voice-part audio section, such as Soprano 1.
- Select Reorder audio files, drag the tracks into the preferred order, and save.
Repeat the last two steps for any other voice part that needs a different order. Members see the saved order when they open that voice part's audio list.
Keep the audio library clear
- Give tracks useful names such as “Tenor with piano” or “Full choir mix.”
- Use the voice-part assignment for access and the practice-list assignment for the tracks members should practise now.
- Upload full mixes to all sections instead of adding identical copies to every voice part.
- Use the three-dot menu to share, edit, export, move, or remove a file when those actions are available to your role and device.